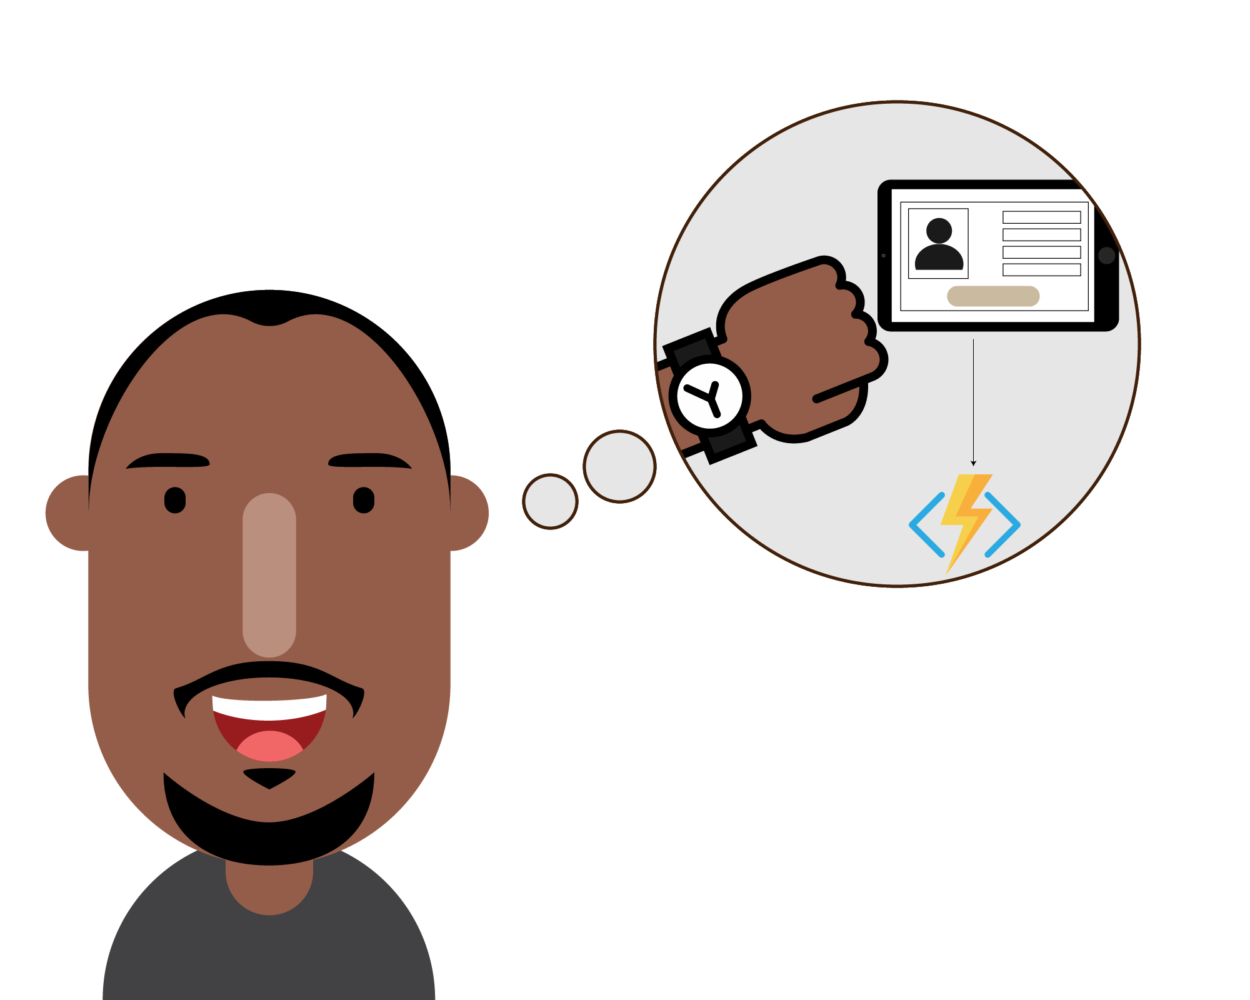
As one who’s grown accustomed to certain routines that have shaped my outlook and attitude towards life, I’d always dreamt of passing some on to my kids. Hence, I recently came up with an idea for a routine app codenamed A4K that I could use with Funke on a regular basis. Its goal would be to introduce her to subtle words and phrases that affirm certain core values about herself and life. On another hand, it’s an app that I hope further cements our parent-child bond as we spend time on it together. Given its wider benefits to other kids and parents, I thought I’d build some features into it early on. Because the A4K App relies on some form of customization, my first problem statement was,
How might I create a cost-effective, scalable and secure Registration Backend for the A4K App?
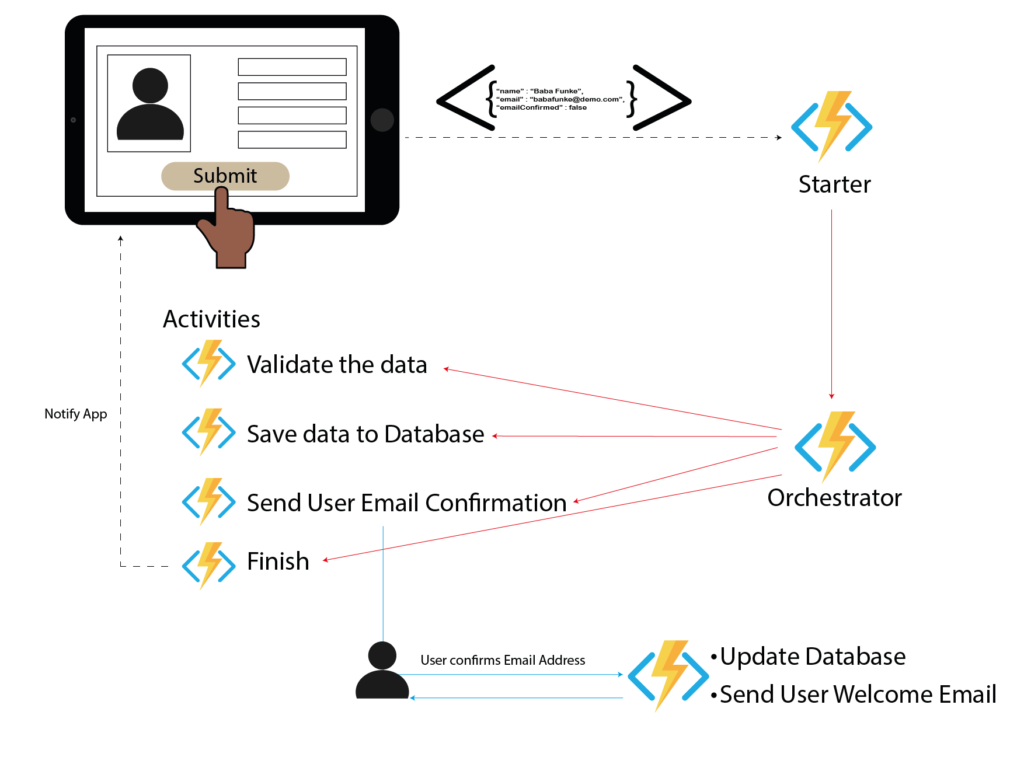
For a start, registration in this case simply means capturing a username, email and some other customization details. There’s no need for a Password, at least for now. With that, I came up with the solution architecture involving Azure Functions and Table Storage; a combination that satisfies the scalability and cost-effective conditions from my experience.
A brief introduction to Azure Durable Functions
Azure functions as we probably know are consumption based stateless functions that are triggered by events. In different posts, I have used them for recurring tasks or as HttpTriggered API endpoints. They include several useful triggers such as Timers, Service Bus, Queue, Blob, Http to mention a few. One major drawback is they don’t save state. To contextualize this for the registration feature, I have a sequence of steps that need to happen one after the other. In other words, the data from the App needs first be validated and if it passes, persisted to Table Storage and then an email confirmation sent. What that means is, I have to keep track of the result of each process which in a sense is what state management is. That’s where Durable Functions come in.
According to Microsoft’s official documentation, Durable Functions is an extension of Azure Functions that lets you write stateful functions in a serverless compute environment. The extension lets you define stateful workflows by writing orchestrator functions and stateful entities by writing entity functions using the Azure Functions programming model.
Behind the hood, Durable Functions make use of Azure Storage tables and queues to manage state. With that, Durable Functions offer capabilities for retrying function calls, calling external events, waiting for external events to return results with which to proceed among others. That in a nutshell is why this works for my use case.
There are 3 main concepts to be aware of when it comes to Durable Functions. These are Starters, Orchestrators and Activities. As demonstrated in the diagram, the Starter is what gets called when the App passes information. The Starter begins the process calling the orchestrator which then manages the activity calls. The Activities are the individual function tasks like validation etc. The Orchestrator goes to sleep after every call and wakes up on completion of that activity to call the next one. Lastly, Azure Durable Functions provide a set of restful APIs to keep track of the process should you chose to.
How?
The solution which is available on GitHub consists of 3 projects (4 if you include the Unit Tests). Below, I explain its implementation.
I. Shared
This is simply a Class library project with the common models, entities, enums and constants shared by other projects.
For this, we install the Nuget package “Microsoft.Azure.WebJobs.Extensions.Tables”. This will be used for our Entity since we’ll be persisting data to Table Storage. Table Storage is preferred over a relational database like MS SQL Server owing to its cost effectiveness plus it suffices for my use case. The 2 main classes are the AppUser and AppUserEntity which map to one another when it comes to retrieving and persisting data. This is consistent with how Azure Table Entities work.
The Enum simply provides a way to keep track of the registration workflow.
One other model is the ActivityResponse. It’s a custom class I introduce to manage the response I get back from each Activity Function as you’ll see. This way, I can return a well detailed response to the app or log. Some of these will make more sense as we get into the Durable Functions project in step III.
II. BabaFunkeEmailConfirmation
This is an HttpTrigger Azure functions project. It serves as the URL that gets called for confirming emails. It is this URL that gets sent to the user to confirm his or her email. It also has the functionality to update the user’s profile in the persisted data from above.
When a user clicks the confirmation link sent via the Durable Functions registration process, it checks Table Storage for the existence of the user’s record, validates the code sent in the URL before updating the records for EmailConfirmed and Updated columns. Lastly, it sends out a Welcome email to the user. For these, we use built-in Output Binders. These are simply out-of-the-box attributes that Azure provides for handling specific functionalities. In this project, we make use of SendGrid’s and Azure Table Storage’s. They abstract the process of manually creating clients, connections etc. In all, the following Nuget Packages were used.
- Microsoft.AspNetCore.Http.Abstractions
- Microsoft.Azure.WebJobs.Extensions.DurableTask
- Microsoft.Azure.WebJobs.Extensions.Http
- Microsoft.Azure.WebJobs.Extensions.SendGrid
- Microsoft.Azure.WebJobs.Extensions.Tables
Add a reference to the Shared Class library project from Step I above.
III. BabaFunkeAppRegistration
This is the Azure Functions project that uses Durable Functions. This consists of the workflow for validating, persisting, registering and completing the initial process.
To create one in Visual Studio, simply select the Azure Functions project template and select ‘Durable Functions Orchestration’ as shown below
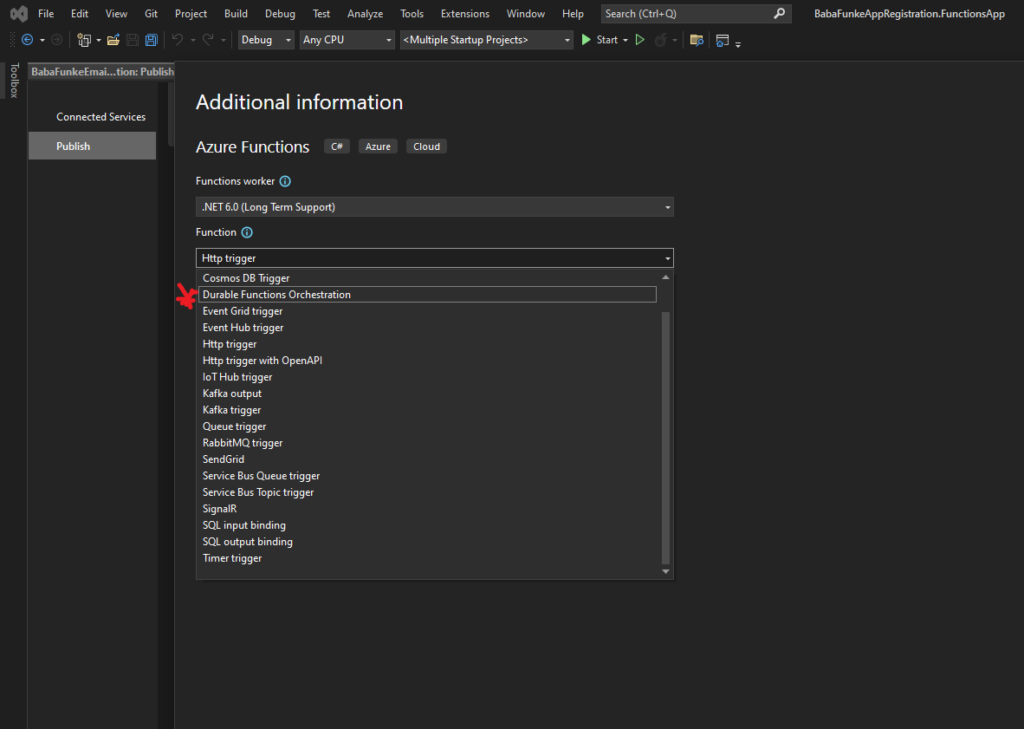
You will get a default Funtion1.cs file which shows you the core structures of a Durable Functions App consisting of a Starter, Orchestrator and Activities which I explain below.
Add a reference to the Shared project from Step I as we’ll be making use of it.
Starters
This is an HttpTrigger function for obvious reasons. The HttpTrigger provides us with an API endpoint which we can call from our frontend to start the workflow. In this case, the most notable feature is the DurableClient attribute.
In our case, we’ll be sending data from the A4K App as a post method. The HttpRequest parameter provides a means of getting the content of the body. Lastly, we return an IActionResult which we pass back to the App.
The first step is getting the HttpRequest body and deserializing it into an AppUser. Basically, the Username and Email body are all we are asking for from the client side.
An InstanceId is auto-generated once the process starts. This is important as it’s used to keep track of the entire process to the end. This also ensures we can use functionalities like retries should we chose. Under the hood, Durable Functions make use of Azure Storage to persist details about each orchestration. This is how it ensures state management so you can track its progress, completion state, output and even re-run.
Activities
These are simply the individual tasks that we want to perform. In this case, I’m validating the payload from the app, persisting data, sending an email then completing the registration.
ValidateAppUserActivity
The thing to note here is the ActivityTrigger attribute binding which tells us that this is an activity. The orchestrator will go to sleep while this activity is running.
For this, I use a service to abstract the validation functionality.
PersistAppUserActivity
This adds the validated user data to Table storage. We convert to the Table Entity by mapping the AppUser to AppUSerEntity. We return an error if for example the email already exists as it’s the unique key in our table.
SendConfirmEmailActivity
This sends the email using SendGrid’s output binding. It gets the necessary details from the local.settings.json file. I’ve provided mine (checked it into source control with dummy data so you can easily replace with yours).
CompleteRegistrationActivity
This is just to log that the process is complete. This completes the registration process managed via the durable functions.
Orchestrators
You can think of the Orchestrator as the control room where the Activities get called in the order that we want. In this case, it’s sequential. In other words, subsequent processes are dependent on the outcome of the previous. Hence, we’ve defined a custom response class to handle the details so we can track the progress of each and return to the client for ease of reference.
Conclusion
How might this be useful to you? One of the lessons I learnt from my previous business is to never underestimate the essence of user data from day 1. With the Genii Games suite of Apps, I accumulated tens of thousands of emails even before I knew what I could do with them. So, you may use this simple backend to capture essential user data that feeds your marketing funnel. It goes without mention that you should consider GDPR. If you’d like to discuss your specific needs and how this might be useful, feel free to contact me.
References