
In Part I, I shared how I use Azure Functions to automate my daily report generation for the Genii Games App, hence saving me some much needed time. I also demonstrated a walk-through of the process using a mock project available in my GitHub repository.
In this concluding piece, I walk you through the deployment of my Azure Functions to production. Like I mentioned earlier, Azure Functions are called serverless functions for the reason that the infrastructure for running them is handled by Microsoft so you needn’t worry about server optimization etc. Of course, this also comes at a cost but as I’ll demonstrate, it’s dirt cheap!
So, how do I get my Azure Functions from Visual Studio to the Microsoft Azure portal?
I use the Continuous Integration/Continuous Deployment.
In a nutshell, Continuous Integration (CI) is an automated process of testing, building and packaging applications while Continuous Deployment (CD) is an automated delivery of the built application. CI automates the build process of the web app so I don’t have to manually publish it myself. Then CD automates its hosting so that I don’t have to manually upload the published file via FTP or some other means had it been manually built. That’s it. It can seem a lot more technical than that but the concept is fairly straightforward. The process involves setting up version control for our project then the CI/CD pipeline. Once code is committed to the specified Git Repository tied to the CI/CD pipeline, it kicks off the process. All things being equal, the developer simply commits code and that’s it; the pipeline handles the rest of the process.
Setting up CI/CD is quite easy. Usually, you don’t have to bother about the technicalities involved as there are tools that take care of those under the hood.
Phase I – Azure Portal
First, navigate to Microsoft’s Azure Portal and register for free. The Azure Portal is home to a wealth of services including website hosting, database hosting and much more. This is where our Azure Functions will live and run.
Step 1 – Setup Subscription on Azure Portal
This is the first step especially if you’re new to Azure. If you’re new, you should be eligible for a free 1 month subscription so take advantage of it.
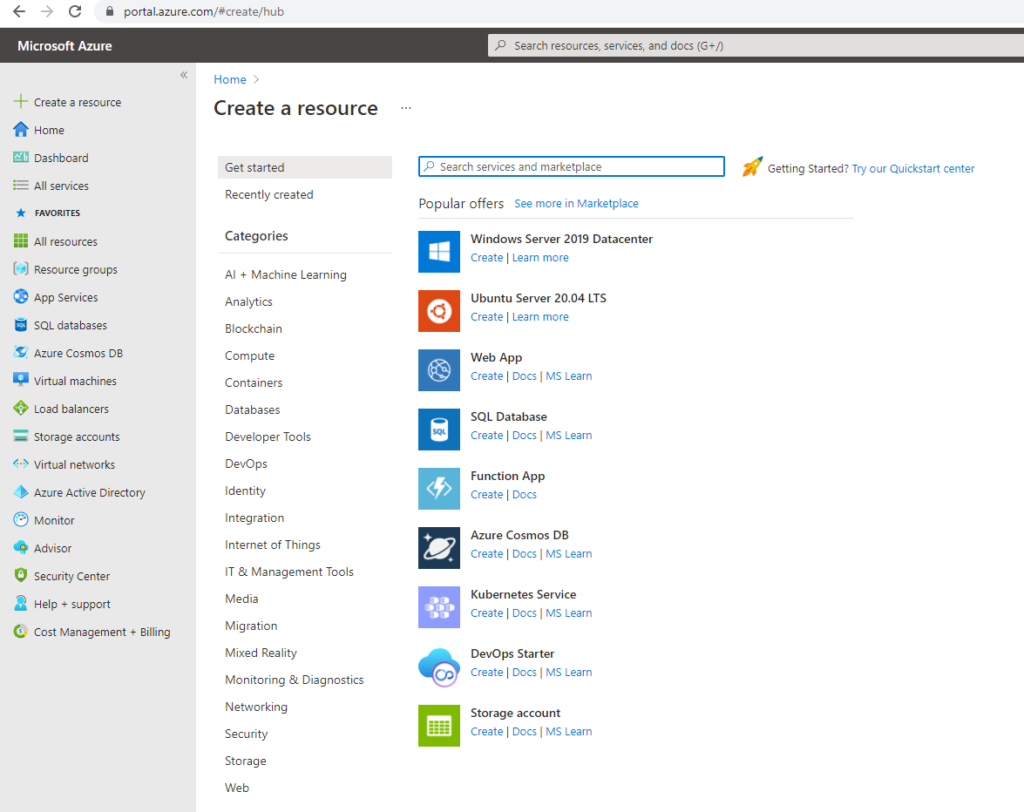
Step 2 – Create a Resource
Azure has a wealth of resources that seems to be growing by the day. It can be overwhelming even for an experienced user. Think of any service as a resource in Azure. To host a website, you’d create an App service. Enter Azure Functions or Function App into the search bar or as in my case, it’s listed among the popular offers as ‘Function App’. Click Create next to it.
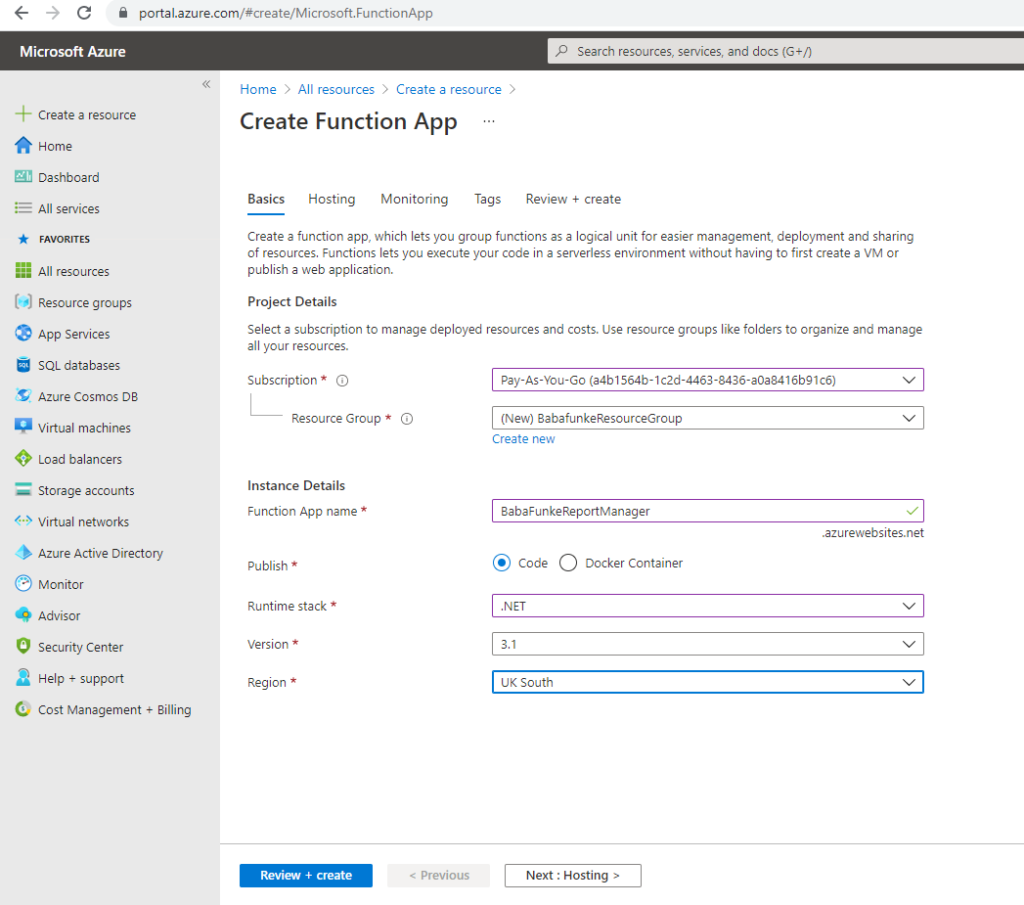
Step 3 – Populate Function App form
Subscription – select the subscription created in Step 1 above from the dropdown list. Mine is a Pay-as-you-go subscription since I’d initially exhausted my free subscription offer.
Resource Group – a resource group as the name implies is a way of grouping resources together. It can be handy when you want to dispose of multiple resources in the same group. Create one and give it a name.
Function App Name – name it as the function app in Visual Studio
Publish – Use Code except your application is built on a docker container.
Runtime Stack- I use .Net since my Azure Functions is a .Net version. Recall I mentioned Azure Functions can also be built using other languages like Java and JavaScript.
Version – I use 3.1 consistent with the Asp.Net Core 3.1 version my project was built in
Region – Select the closest one to you for the server location
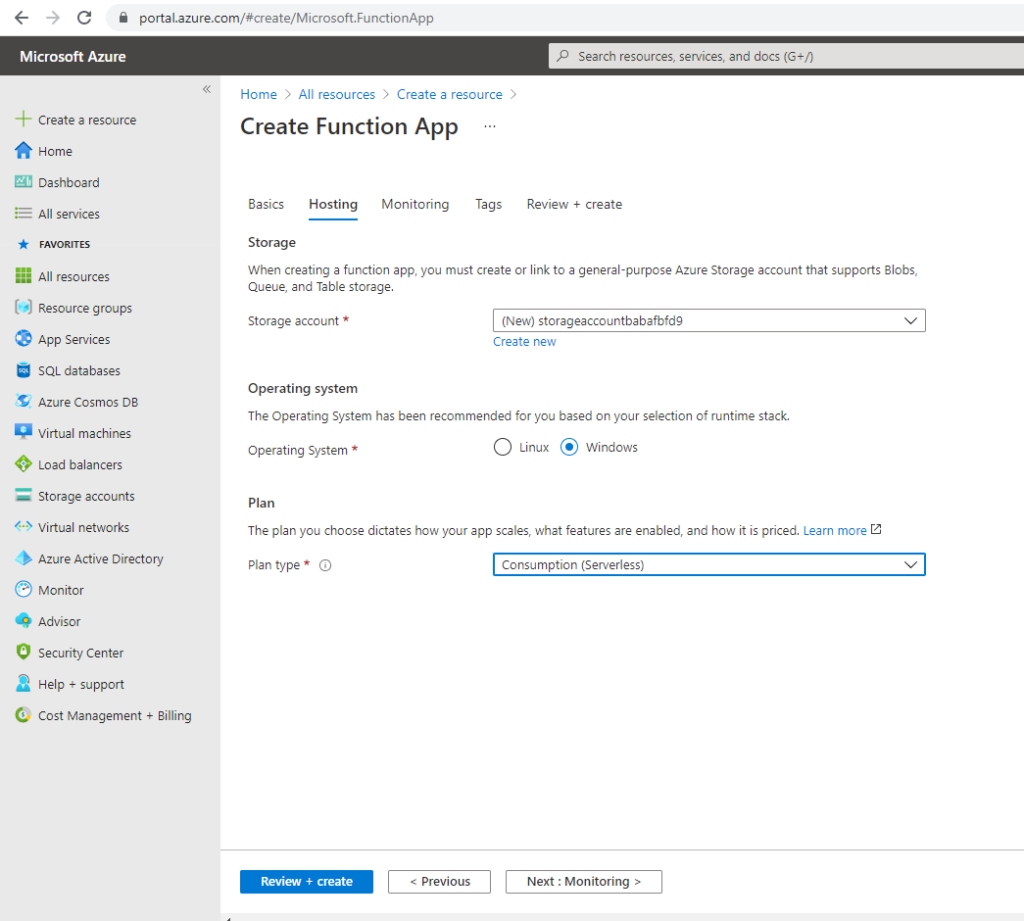
Move to the next tab (Hosting)
Storage Account – You can leave the Storage account name as it is. Azure Functions are tied to Azure Storage which is a host of resources that support blob storage among others. It’s a useful feature that I may touch on in a future piece as I’ve found them useful for some integration tasks. For example, we could decide to store the generated CSV report files as blobs in Azure Storage.
Operating System – Windows
Plan – This is an important one. You have 3 options but the recommended one is ‘Consumption (Serverless)’ which basically calculates the cost based on your usage.
Move to the next tab (Monitoring)
Application Insights – this is an optional but useful feature for debugging. You can literally see how your function is performing. I’ve found it useful for other applications when tracking errors.
You can skip Tags and just hit Select + Create tab. Check the overview to ensure it’s consistent with your previous options especially the consumption plan.
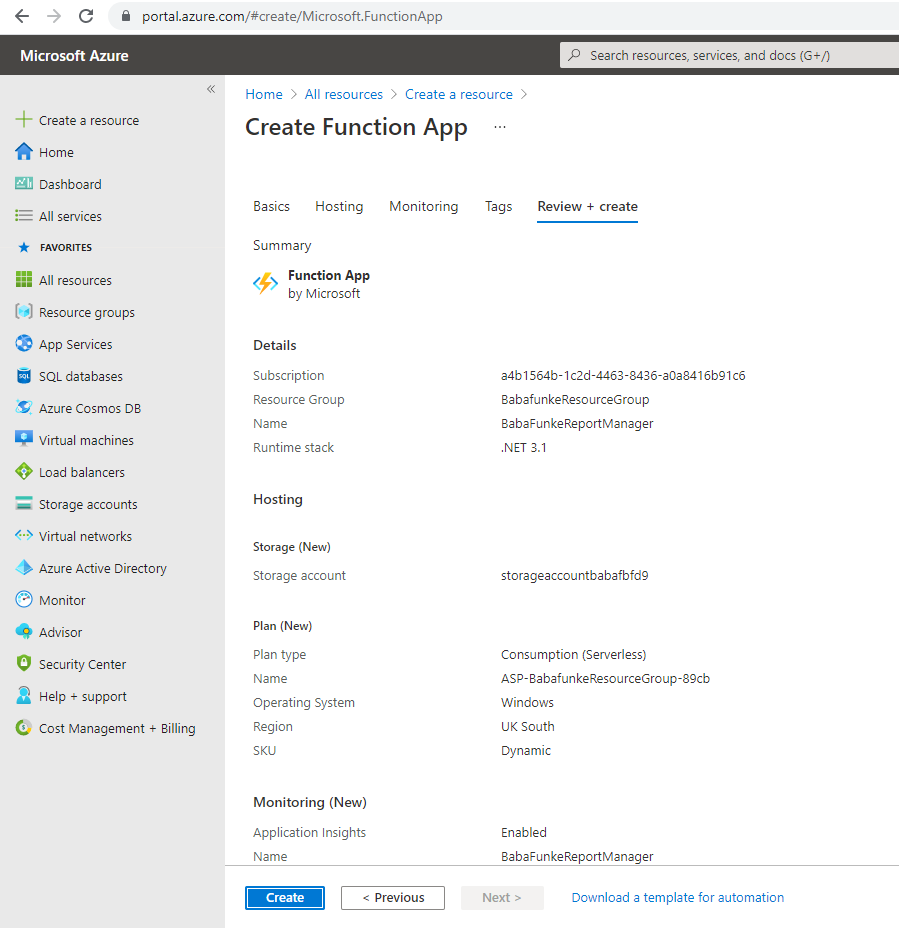
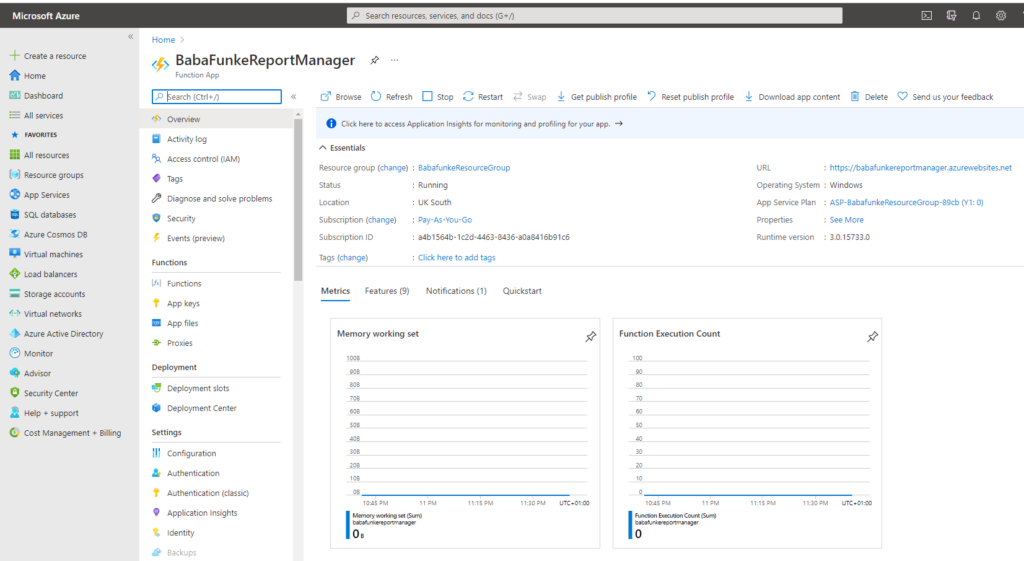
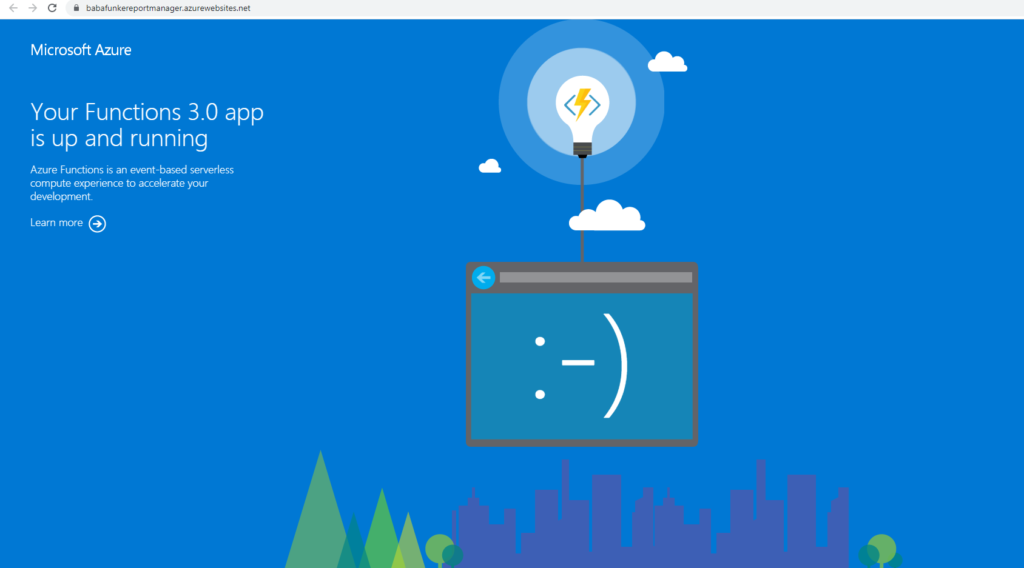
Give it some time and it should be created within minutes. A URL is assigned which you can view by following the link. You should only see a static page with texts that the function is now running but you still need to publish the actual function to see it in action.
Phase II – Azure Devops
Step 4 – Create a project in Azure Devops
Sign up or login to Azure Devops. Azure Devops is Microsoft’s service that provides tools for version control, testing, building, deployment, software project management among others. I use it for my private projects, hence I already set up a project and repository for my Azure function project created in Part I.
If you haven’t done so, create a new Project and commit your project to the repo. You could simply clone the mock project in Part I to this repo.
Step 5 – Set up the build pipeline for Continuous Integration
This is the Continuous Integration part which will ensure our Auzre Function is automatically built and packaged for deployment.
Select your project then select the Pipelines on the left. Select ‘Create Pipeline’
Next, select the ‘Use the classic editor to create a pipeline without YAML’ link below except you understand the jargons of YAML. I couldn’t be bothered 🙂
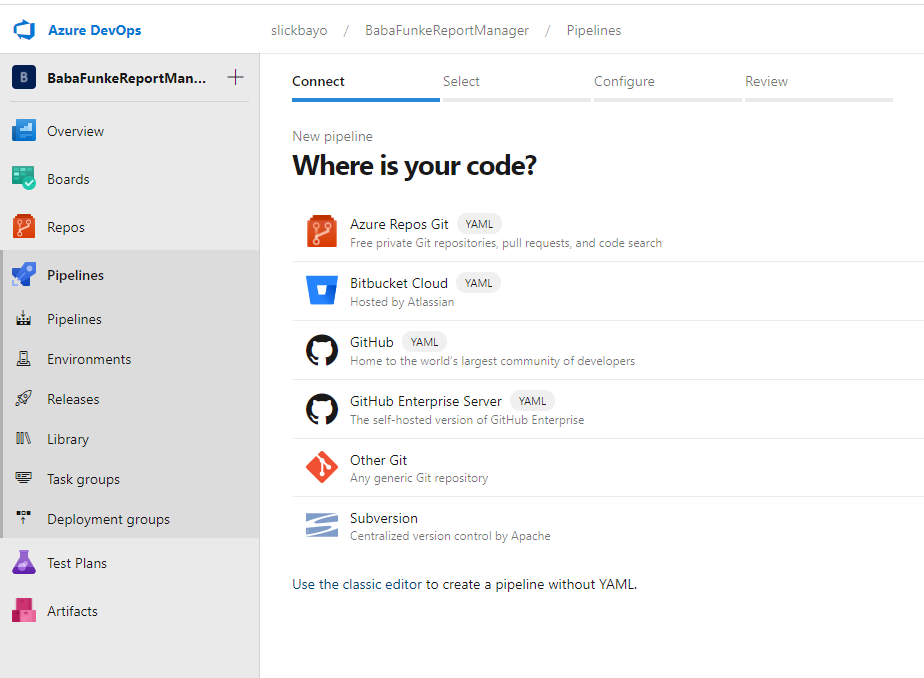
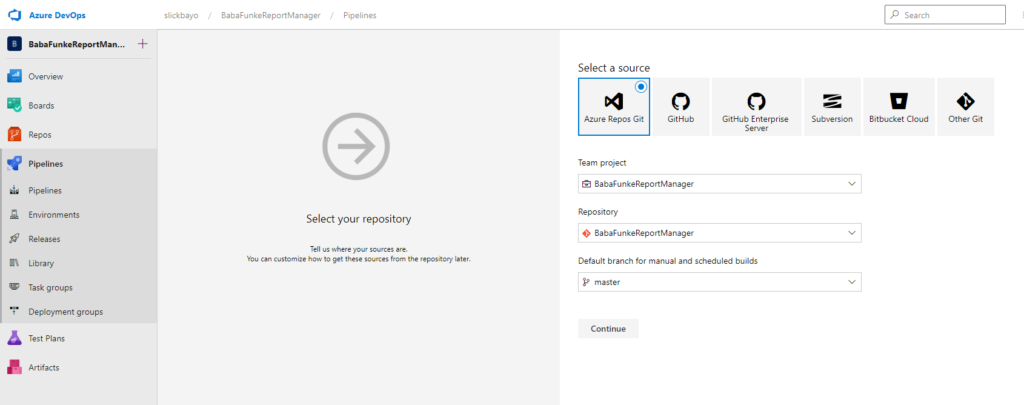
Select your repository. Remember the process kicks off once a commit is made to the repo. If your repo is on GitHub, then select it. Mine is hosted on Azure Devops, so I simply select it from the dropdown list.
Also, select the Branch for which you want to link. Mine has a single branch Master so it suffices.
Press continue.
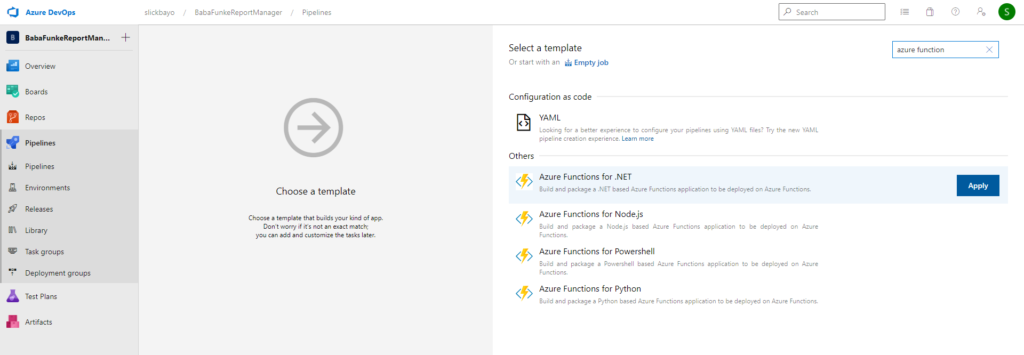
Choose a template. Since we’re interested in Azure Functions, simply search for it. Select the ‘Azure Functions for .Net’ option as ours was built using .Net. And press Apply.
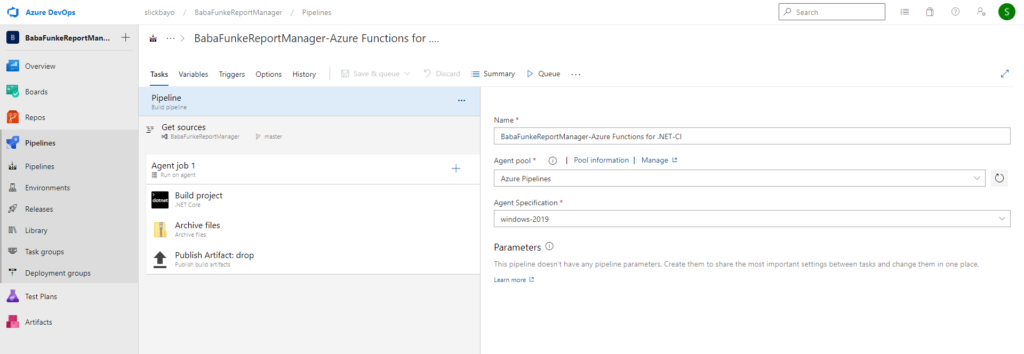
Under Tasks, the only thing I change here is the ‘Azure Specification’ to Windows-2019.
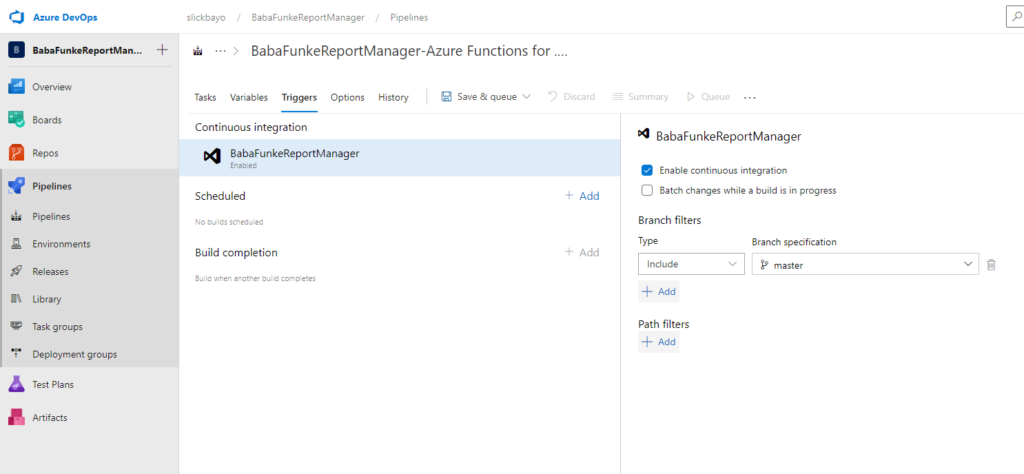
Move to the Triggers tab and ensure ‘Enable continuous integration’ is checked. Under ‘Branch Filters’ select Include under Type and select the Branch to include under Branch Specification. My repo has only the Master branch so it’s selected.
At the top, select the ‘Save and Queue’ dropdown and click Save.
Step 6 – Set up Release Pipeline
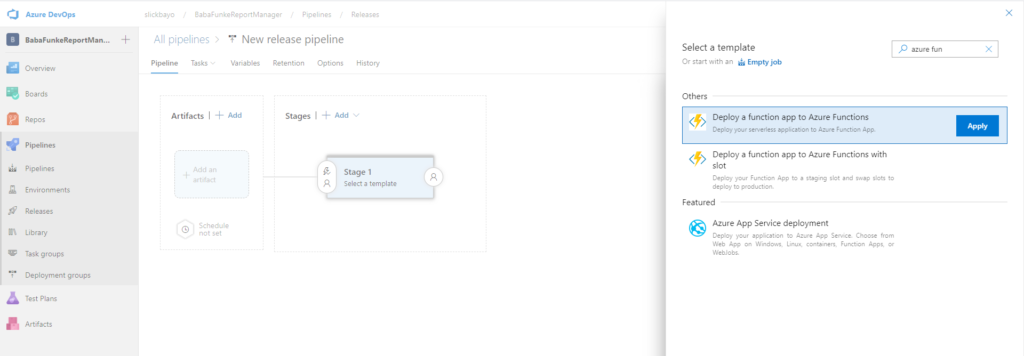
First, Create a new Release Pipeline. From the page that pops up, search for Azure Functions on the right side search bar. Select Apply next to the ‘Deploy a function app to Azure Functions’ option.
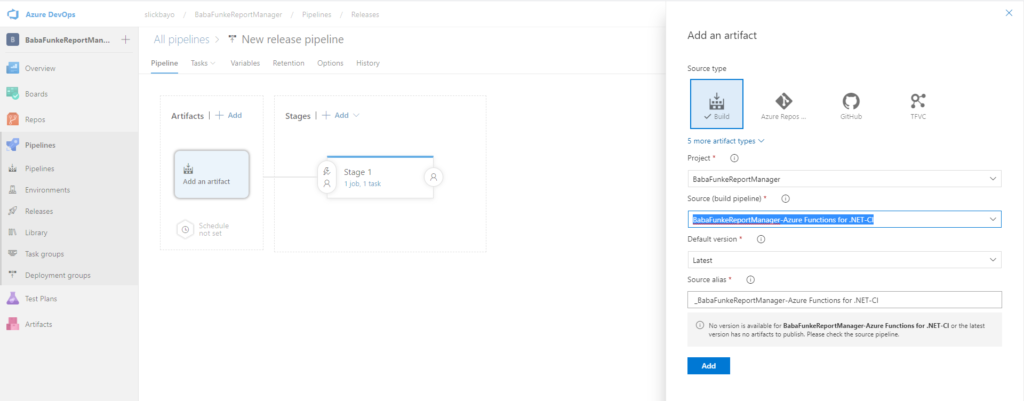
Select the Artifact on the left. The Artifact simply refers to the package that will be used for the release. In this case, our build pipeline delivers a package upon completion. Select the right project created from Step 4 under the Project dropdown and also select the Source Build Pipeline. The name should be obvious to you from the previous process. Select Add.
Select the thunderbolt icon on top of the Artifact; hovering over it should show the tool tip ‘Continuous deployment trigger’. Enable the Create a release every time a new build is available. This is self-explanatory. It simply starts the release process to deploy your application every time a new build becomes available. A new build becomes available when you commit code and the build pipeline starts and completes the build process.

Select the link ‘1 job, 1 task’ link under Stage 1 or select the Tasks tab at the top next to Pipeline. Enter in your details most importantly, your Azure Subscription created in Azure Portal from Step 1. It might ask you to validate your ownership. Once done, the App Service Name dropdown populates with available options created in Azure Portal. Select the Functions App you created then in Step 3.
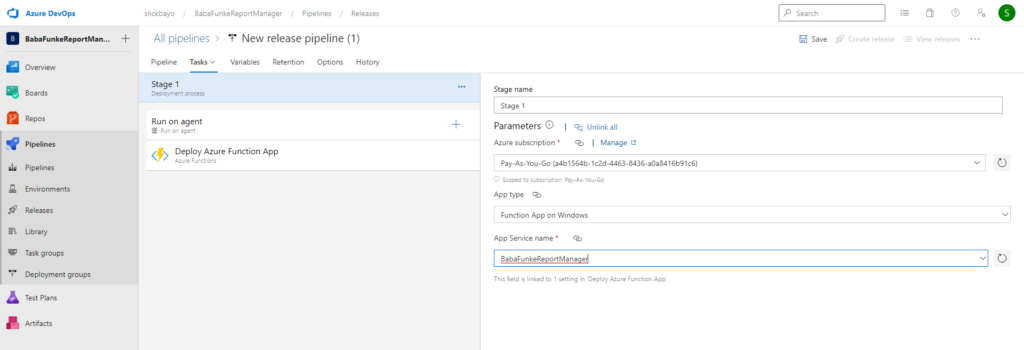
Select the ‘Deploy Azure Function App’ pane on your left. The Azure subscription, App type and App name should still be pre-populated per your previous settings above. Check the box for ‘Deploy to Slot or App Service Environment’. Doing this reveals the Resource Group dropdown and you should select the Resource Group you created in Azure Portal from Step 3. That’s it. Hit Save!

Testing
To test that all is working fine, you simply need to make a commit in your code. So, open up the Azure Functions project in Visual Studio, make a minor change then commit your code locally and most importantly, push to the remote repository.
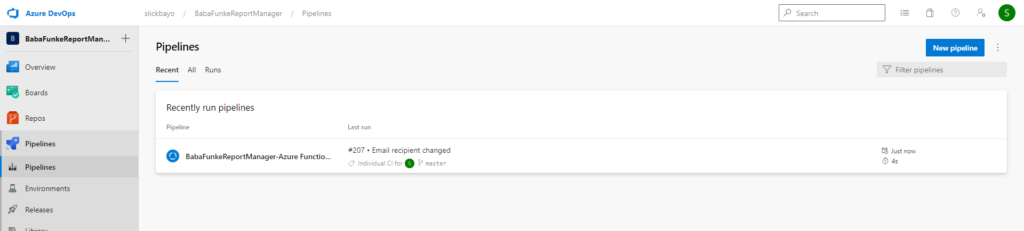
Next, navigate to Azure Devops and select the Pipeline to see the build process in action. The blue icon on the left should be spinning to indicate the build pipeline is in progress. You can select it to view a log of the progress as it unfolds. Once done, the release will kick in leading to the deployment of the function.
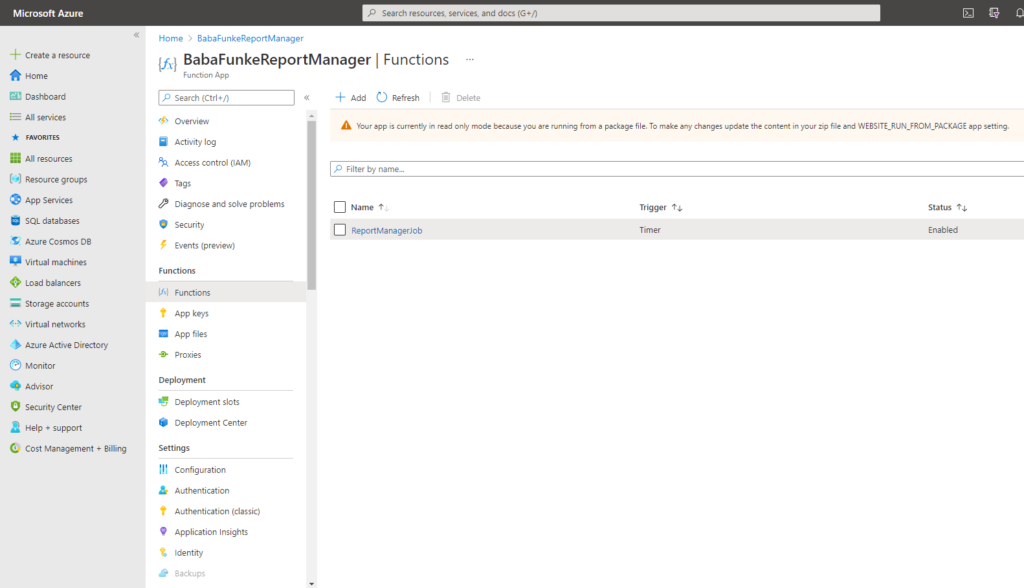
To confirm its deployment, navigate to Azure devops and you should see your function. This is the exact name of the Function class and not the project so take note.
Of course, final verification is when the job starts running based on your schedule. In my case, everyday, I wake up to emails with a CSV attachment of my customer report. That’s it! I don’t have to do anything else. If I have to make any changes then I simply do that to my source, make a commit and push to the remote repo and bingo, the pipeline does the rest.
If you need any help with this, feel free to contact me.